Hello, and thanks for viewing our poster from WAIS Workshop 2022 (but
it’s also all good if you didn’t!) This page holds videos, extra images,
and other good stuff that we couldn’t put on a poster.
Poster
Click here for your very own copy of the
poster! (In screen-resolution PDF form. Sorry, we sold out of the
T-shirts already.)
The basics: CW cuts
When we first got our 1 kW laser source last year, pulsed operation
took a little bit of setup—it requires a proprietary piece of software
with no API, so we eventually had to reverse-engineere its communication
protocol to integrate it into our experiments—so our early cutting
experiments were done with continuous-wave beams.
We use cheap webcams with laser-reflecting filters for monitoring
experiments, and also for trying to get interesting—if risky—angles.
Bonus: this sensor sees the near-infrared laser as a purplish light.
Here, a rectangular rod of tap-water ice, about 1 inch on each side, is
moved downward at 2.5 mm/sec through a 550 W beam of 1.07 μm CW laser
light. The ice starts out somewhere north of -20 °C and is experimented
on in room temperature, which doesn’t help limit the rate of meltwater
production.
A webcam shot from the other side of the sample, looking (almost) back
into the laser.
One more webcam shot, this time looking downward from the top of the
vertical motion stage that moves the ice sample downward to cross the
cutting beam.
Pulsed drilling
Moving the laser beam around on an ice sample (or vice versa) makes
it a little challenging to closely examine how the two are interacting:
cameras have to follow a moving target, features like bubbles in the ice
can affect the interactions, analysis gets confused by all the moving
things… better to just hold everything steady.
A series of 3 ms, 500 W laser pulses impingent (from the upper left of
the image) at a static point on a sidelit clear ice stick, as viewed
from above.
Two flavors of analysis on the video above. The first displays the
cumulative difference between each frame and the very first,
highlighting the trajectory of the hole; the second plots the progress
of the laser-ice interaction front.
Pulsed cutting
Drilling holes is great for measuring laser mechanics—but it does
have some vital differences from cutting slots, such as greatly
increased capillary forces preventing meltwater from escaping the hole.
Some behaviors therefore require a moving beam to read.
CW cutting can quickly carve through a large amount of ice, but it does
so by dumping in energy, resulting in quite a lot of heating to the ice
(and once that disappears, to the beam stop behind it.)
One positive: it does slice through two inches of ice cube in one go.
Coming down to 5 ms pulses, applied at 10 ms, greatly reduces the
heating of the ice cube…
…even if we cut less far per pass. However, most scientists would
probably prefer this neat slot about 1 mm wide to the CW cut’s
inverted-V-shaped groove over 1 cm across, even if excising the sample
does take a bit longer!
Sampling wedges
We’ve found that some people find the wedge cutting a little hard to
picture, so we took a few days for a fun diversion from our actual
experiments. Bolting a rotation stage and linear stage together gives us
a motion system that can carve a wedge out of a short 3" diameter
tap-water ice core with a wide CW beam. Video is 15x actual speed,
because the built-in-a-day rig is a bit wobbly.
All work and no play makes Jack a dull motion rig, so here’s the same
setup carving a UMN logo. Video is 10x actual speed.
Other things
going on: LN2, ice, and acoustic sensors
We strongly suspect that vibration-free laser cutting will have a
massive advantage over mechanical saws in treating brittle ice samples,
but testing this in the lab is a challenge since ice from the brittle
zones has, by definition, a tendency to fracture or shatter during
retrieval, and thus intact samples are fairly rare. An obvious
alternative: make some tap-water ice brittle. While we are also
investigating more complex options to emulate the internal forces in
natural brittle ice, applying an extreme temperature gradient by
chilling the center of an artificial core with liquid nitrogen seems to
very effectively create fractures.
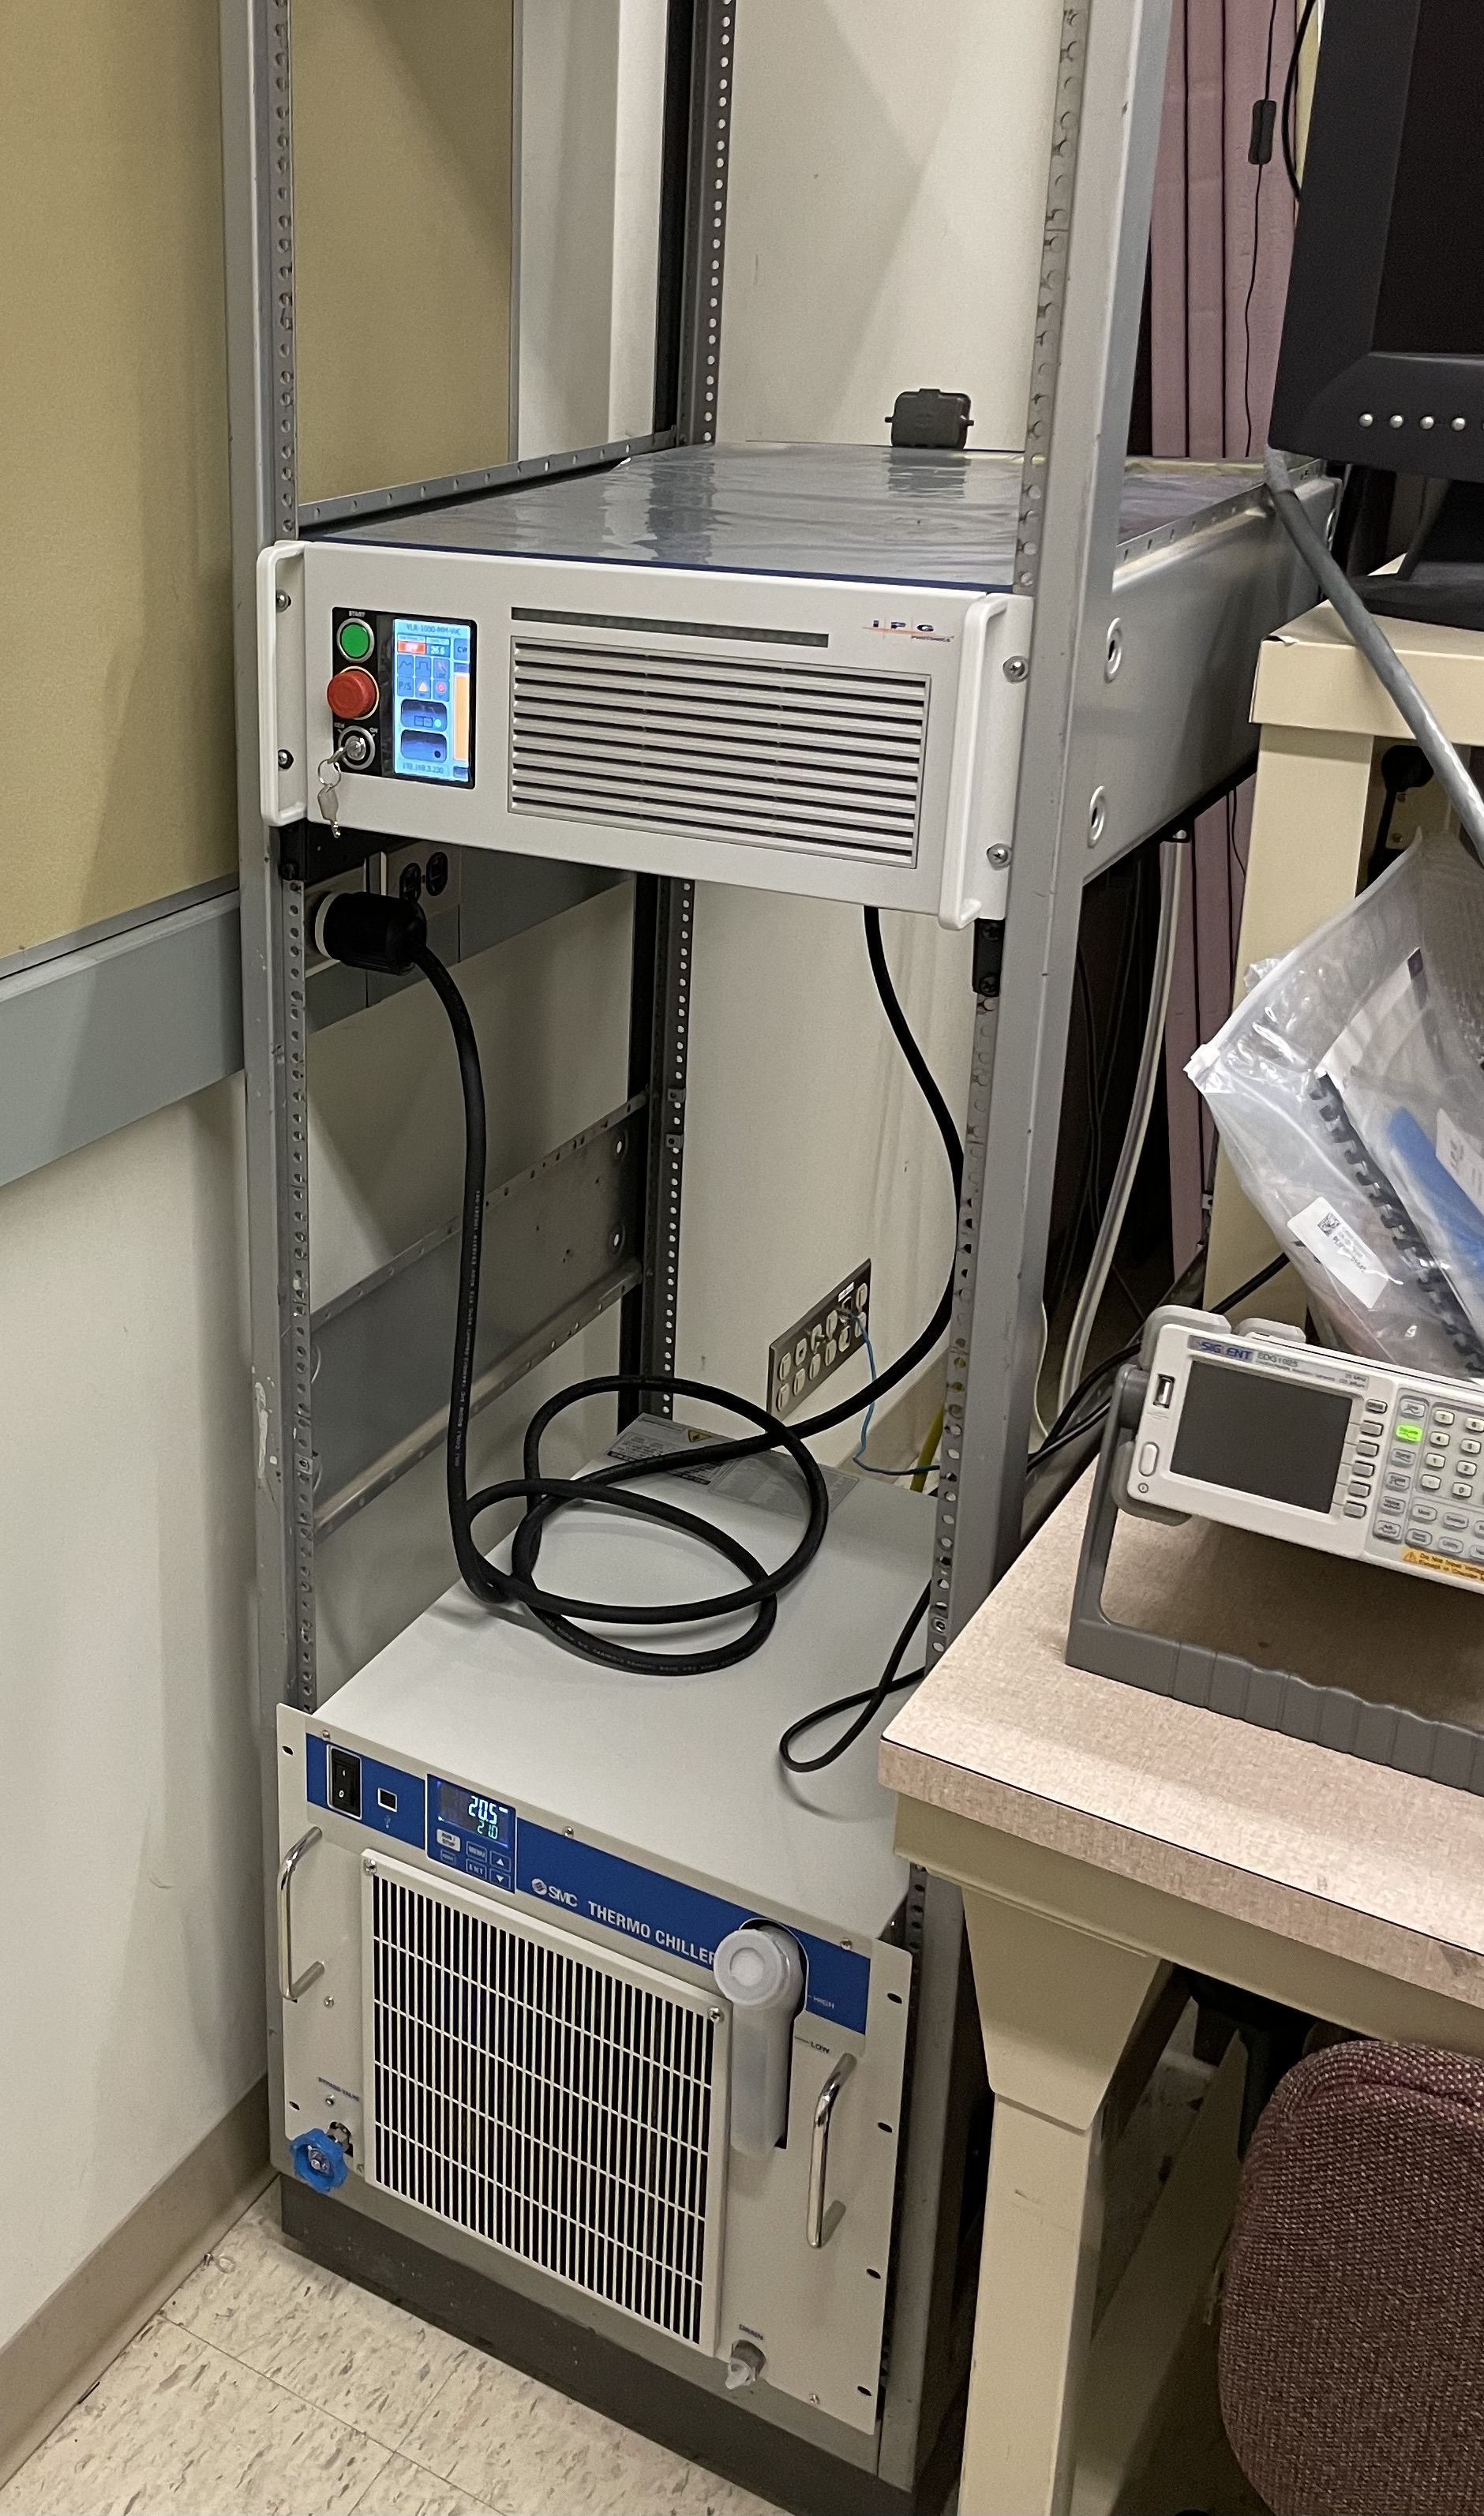
The laser!
Lots of people wonder what a 1 kW laser looks like. While ours has a
disappointing lack of very mad-science flair, its standard 4U computer
server form factor is encouragingly portable. The optical delivery fiber
emerges from the rear, and the bigger thing at the bottom of the rack is
a water-cooling unit.
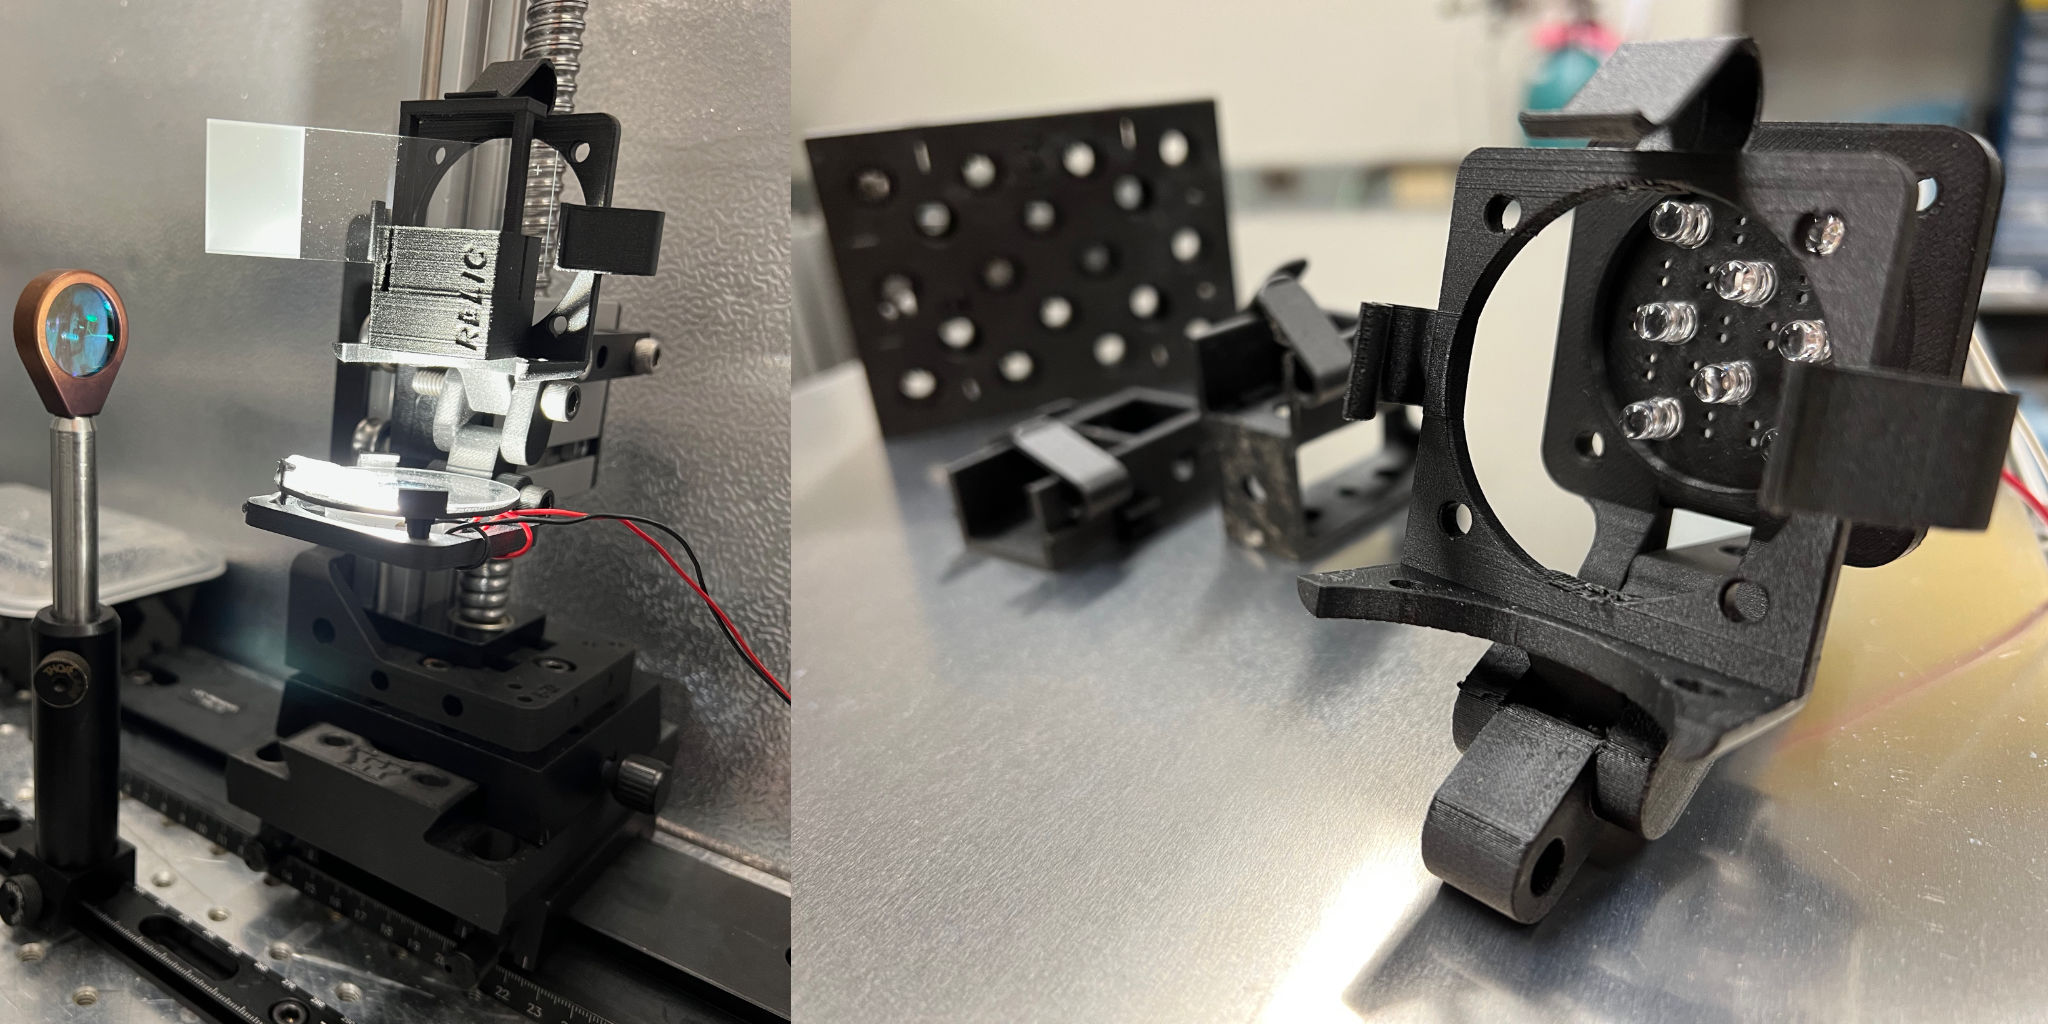
3D printed parts
Some of our rapidly-proliferating lab mechanisms, designed and
3D-printed in-house at UMN.
You might have noticed a number of plastic parts holding our samples,
mounting our cameras, getting frozen into our tap-water cores… You get
the drift. We design and produce these parts in-house with the
facilities and staff of UMN’s Anderson Innovation Labs,
and if any of them look like they might meet your needs, then
our parts are your parts! We’re uploading any designs we think might be
useful to YouMagine, a site
for open-source 3D print designs; however, we’re more often than not
pretty behind on uploads, so please don’t hesitate to ask!